ChatGPT Image Oct 5, 2026, 07_48_03 PM.png

How to Decorate Your Own Jack-o-Lantern Cake | Step-by-Step Halloween Cake Tutorial

Ready to turn your mini cake into an adorable (or spooky!) jack-o'-lantern? You're in the right place!

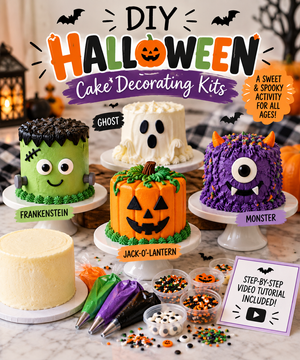
Our DIY Halloween Cake Decorating Kits make it easy to create your own festive Halloween cake, whether you're decorating with the family, planning a Halloween party activity, or simply trying your hand at cake decorating for the first time.

In this tutorial, we'll walk you through everything from assembling and frosting your cake to adding the finishing touches that bring your pumpkin to life.

Follow along with our video tutorial below, and don't worry about making everything perfect. Half the fun is creating a pumpkin that's uniquely yours!
Mini Pumpkin Cake Decorating Tutorial

๐ŸŽƒ **Let's Decorate a Jack-o'-Lantern Cake!** ๐ŸŽ‚

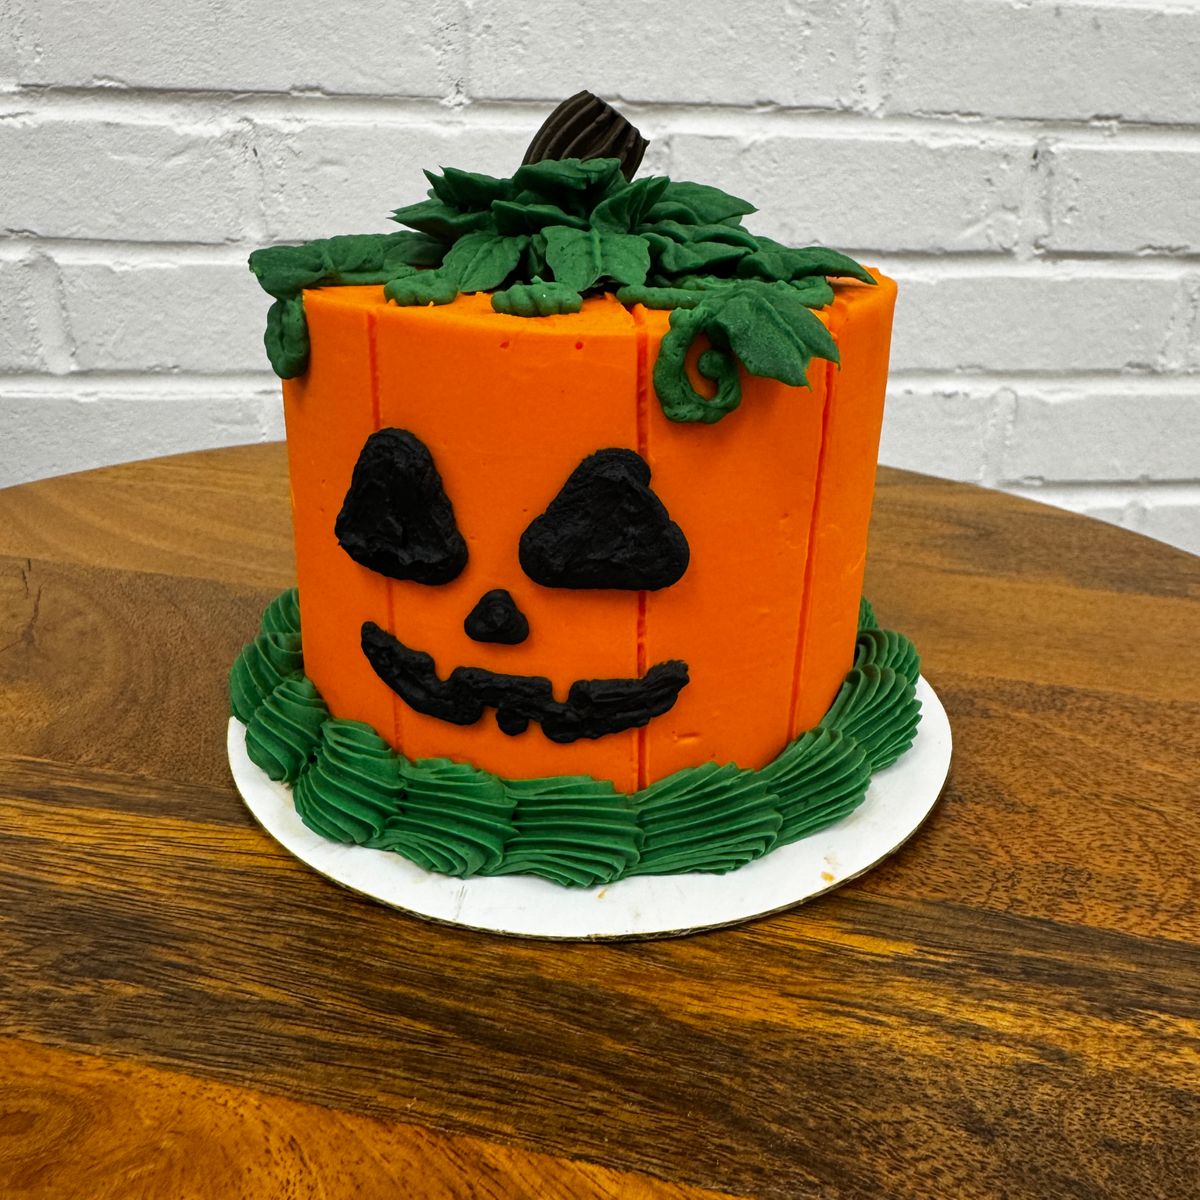
Follow along with The Cottage Cakery as we transform a 4-inch, 2-layer mini cake into an adorable Halloween jack-o'-lantern!

In this beginner-friendly tutorial, we'll walk you through assembling your cake, applying a crumb coat, creating a smooth buttercream finish, and decorating your pumpkin with a spooky face, vines, leaves, and a stem!

๐Ÿ‘ป Perfect for beginners, families, and anyone looking for a fun Halloween activity!

๐Ÿงก Part of our DIY Halloween Cake Decorating Kit collection.

๐ŸŽƒ **Order your kit by October 24!** Pickup available through Halloween morning, October 31.

#TheCottageCakery #HalloweenCake #CakeDecoratingTutorial #DIYCakeKit #JackOLanternCake #ButtercreamCake

https://ellyscottagecakery.com/handheld-baked-goods/shop-our-desserts#!/DIY-Haunted-Cake-Decorating-Kit/p/869102721

Screenshot 2026-10-15 at 3.08.27%E2%80%AFPM.png

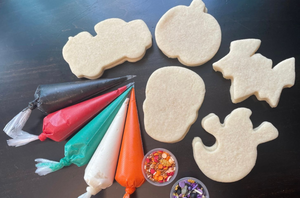
DIY Halloween Cookie Decorating Kit

12 Cookies, 5 Frosting Colors, 2oz of Sprinkles

ChatGPT Image Oct 5, 2026, 07_48_03 PM.png

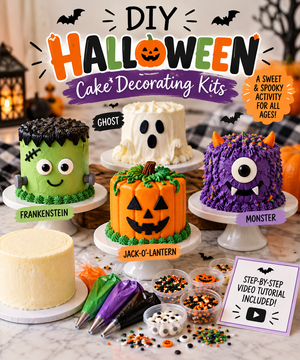
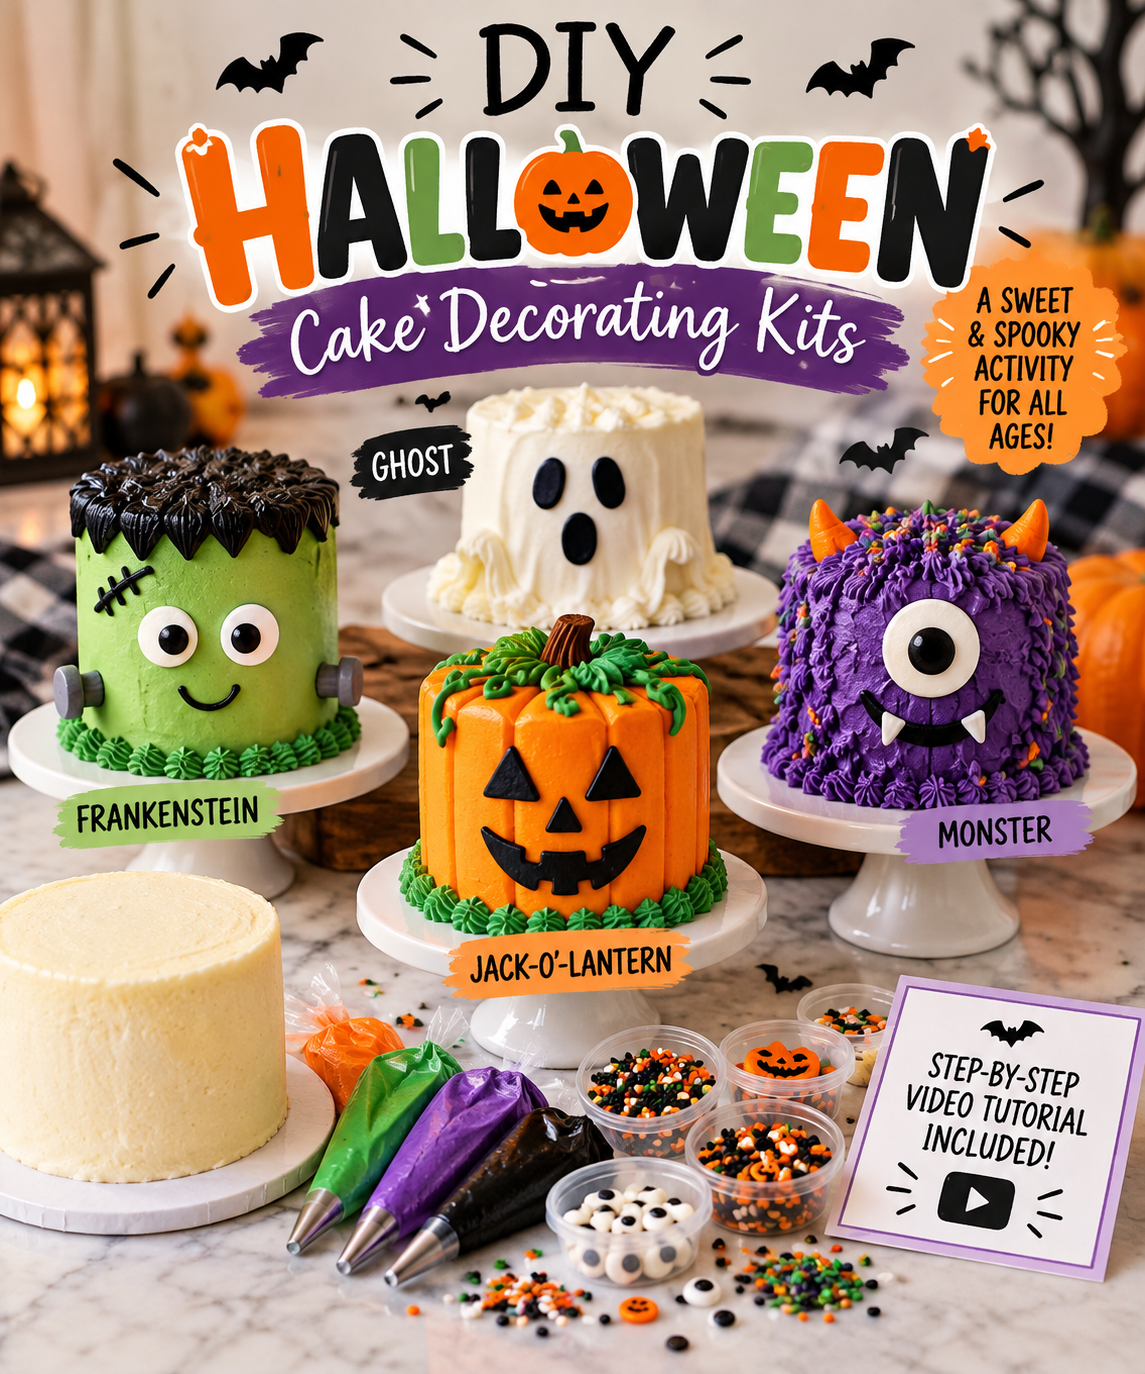
Shop our DIY Halloween Cake Kits

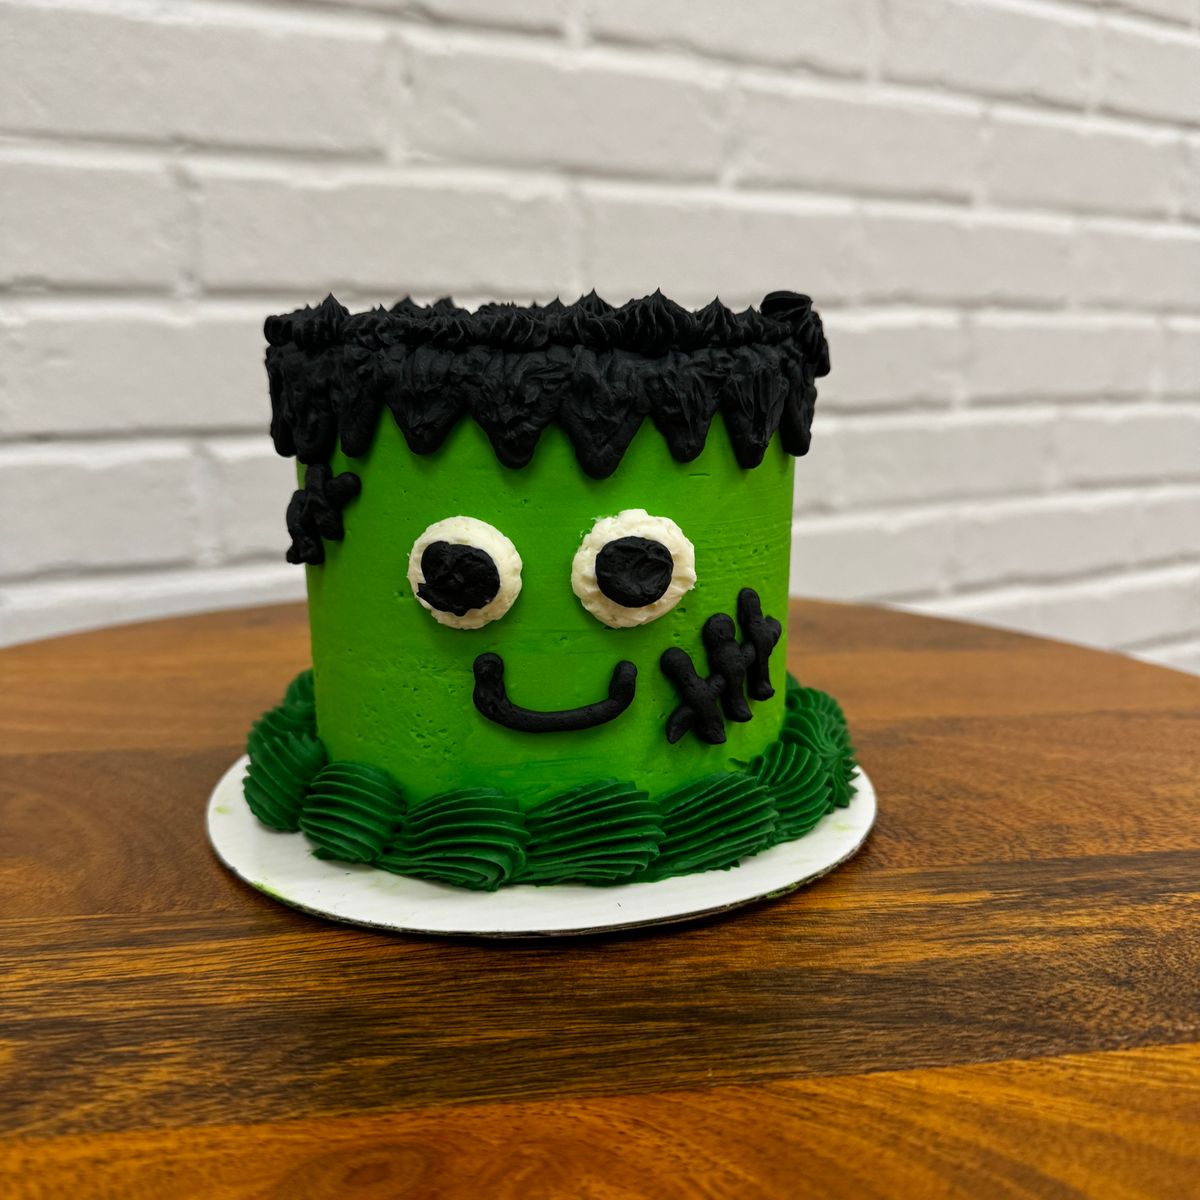
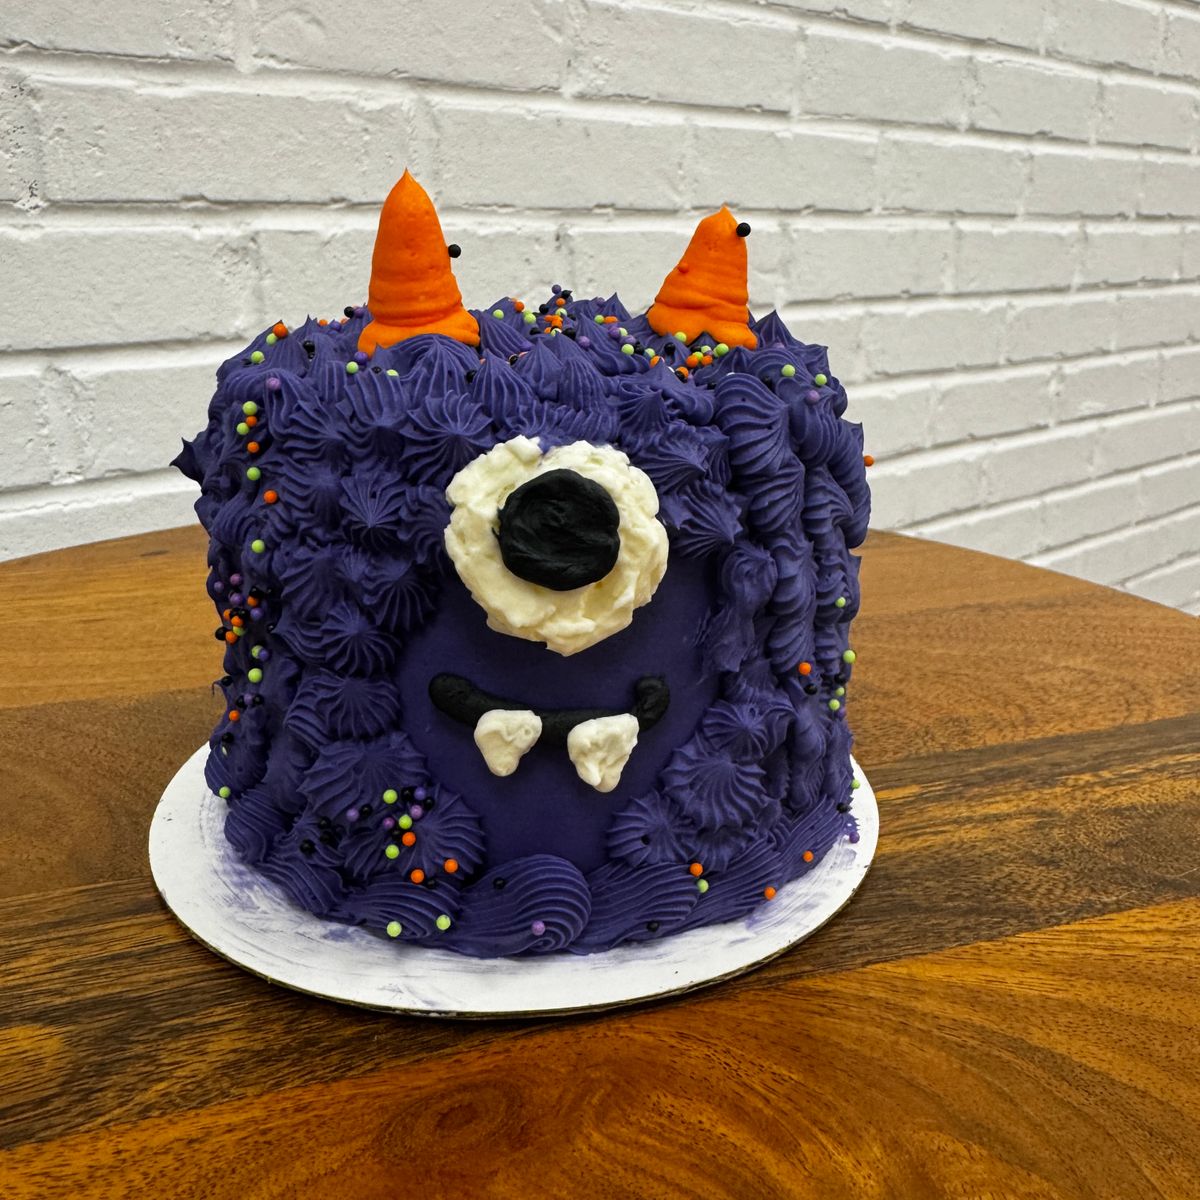
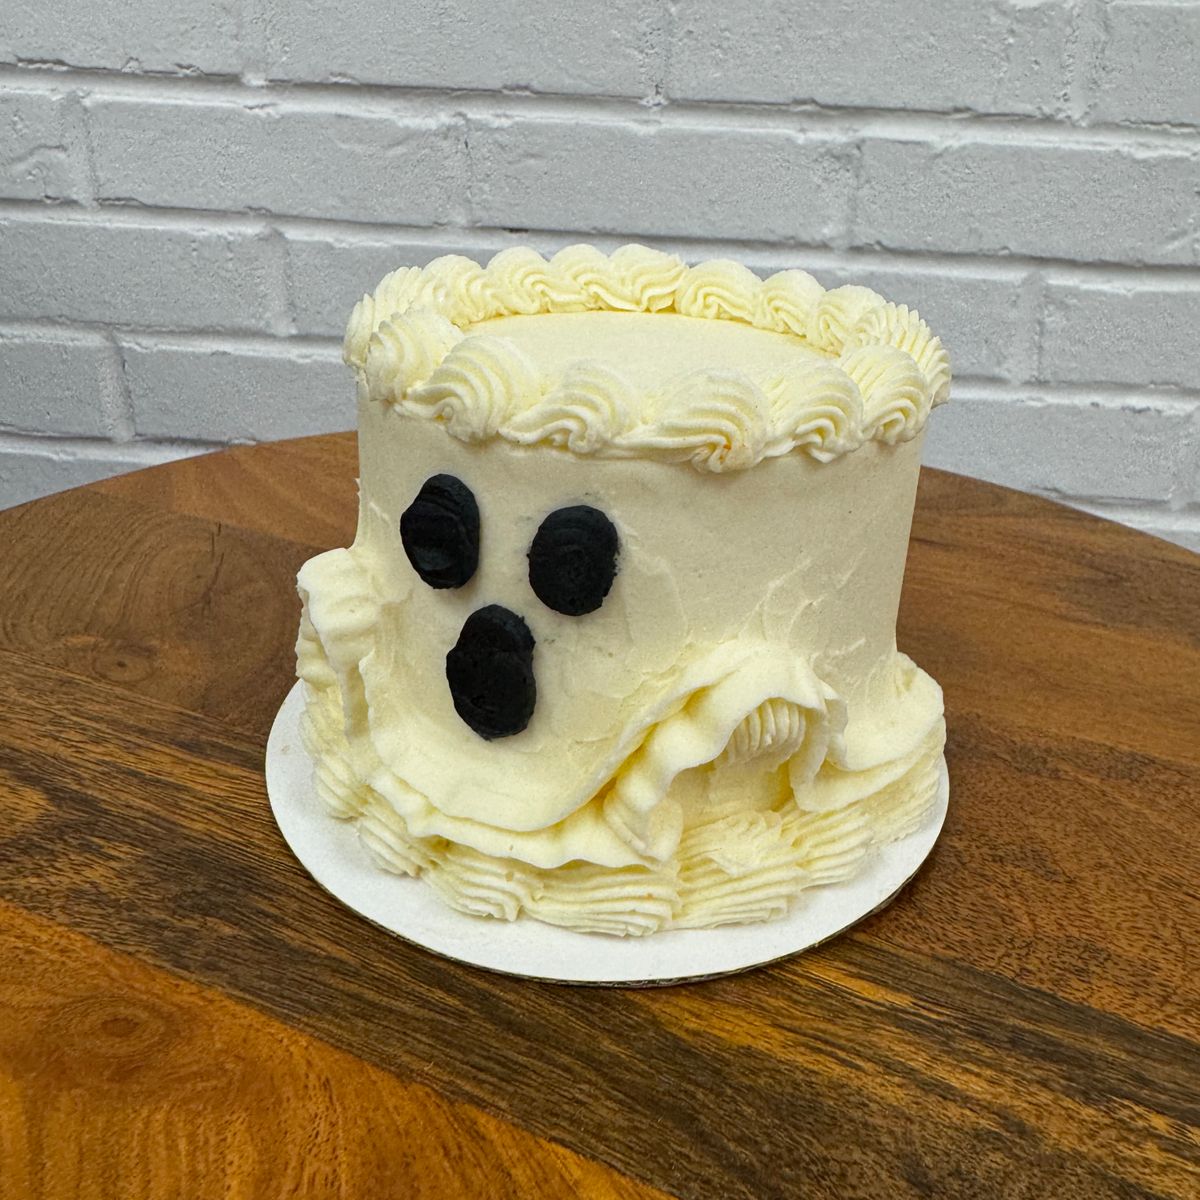
Choose from FOUR designs!

Screenshot 2026-10-15 at 2.49.05%E2%80%AFPM.png

Step 1: Assemble Your Mini Cake

If you purchased the preassembled cake upgrade, you can skip the assembly and crumb coat steps and move ahead to decorating your cake. (1:45 second in the video)

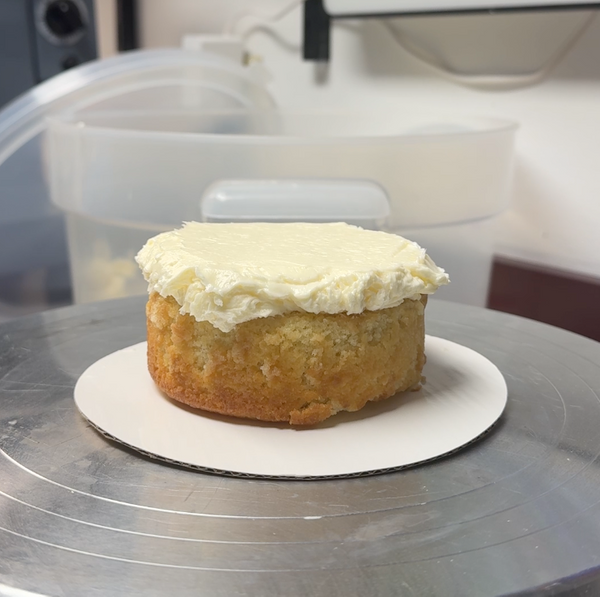
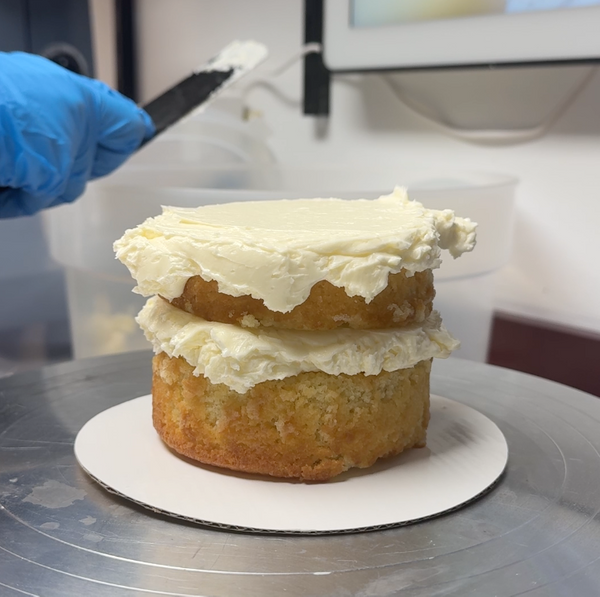
If you purchased the full DIY kit, you'll begin by assembling your two-layer mini cake.

  1. Place a small dab of frosting in the center of your cake board. This acts like glue and helps keep your cake in place.

  2. Position your first cake layer on the board, gently pressing it into the frosting.

  3. Add a generous amount of frosting to the top of your first layer. Spread it evenly to create your filling.

  4. Carefully place your second cake layer on top.

  5. Check that your cake is level. If one side is a little higher than the other, gently press down where needed to even it out.

Helpful Tip: If your filling seems soft or your cake layers are sliding around, place the cake in the freezer for approximately 5 minutes to help the frosting firm up before continuing.

Screenshot 2026-10-15 at 2.50.12%E2%80%AFPM.png

Step 2: Apply the Crumb Coat

A crumb coat is a thin layer of frosting that seals in loose cake crumbs, preventing them from showing through your final layer of frosting.

Don't worry about making this layer look beautiful. Its job is to create a smooth foundation!

  1. Using a butter knife or an offset spatula (included in our optional decorating tool kit), spread a thin layer of frosting around the sides and top of your cake.

  2. Once the cake is covered, use a flat cake scraper to smooth the frosting around the sides.

  3. Hold your scraper straight and parallel to the side of the cake as you work your way around.

  4. Scrape away excess frosting until you have a thin, relatively smooth coating.

Cleaning Up the Top Edge

You'll probably notice a little ridge of frosting sticking up around the top edge of your cake. That's perfectly normal!

Using your offset spatula or knife, gently swipe the excess frosting inward toward the center of the cake.

Important: Wipe or scrape your spatula clean between each swipe. A clean spatula helps create sharper edges and prevents you from dragging frosting back onto the cake.

Once your crumb coat is complete, place the cake in the freezer for approximately 5 minutes to firm up before applying the final coat.

Screenshot 2026-10-15 at 2.53.07%E2%80%AFPM.png

Step 3: Apply Your Final Coat of Frosting

Now it's time to give your pumpkin its smooth, beautiful orange finish!

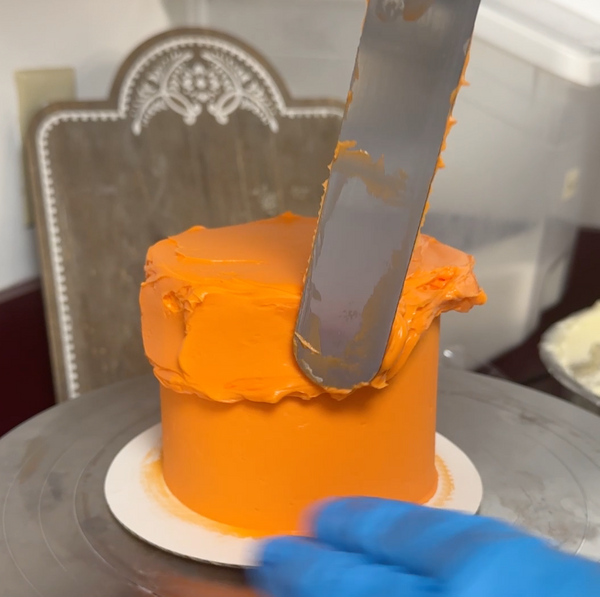
  1. Add a generous amount of frosting to the top of your cake.

  2. Spread the frosting evenly across the surface, allowing the excess to extend slightly over the edges.

  3. Once the top is smooth, change the angle of your spatula so it's parallel to the sides of the cake.

  4. Spread the frosting around the sides, working toward an even coating.

Another option: Instead of spreading the frosting directly onto the sides, you can pipe frosting all the way around the cake and then use your flat scraper to smooth everything out.

How to Get Smooth Sides

This step takes a little patience, even for experienced cake decorators!

  • Keep your scraper straight and parallel to the cake.

  • Maintain an even, steady motion as you turn your cake.

  • If you notice holes, bubbles, or uneven spots, add a little frosting to those areas and scrape again.

  • As the frosting gets smoother, slow down and try to complete your final pass in one continuous motion around the cake.

You may notice a small seam where you lift your scraper away. That's okay! Simply make that the back of your pumpkin.

Finishing the Top Edge

Once you're happy with the sides, it's time to clean up the top edge.

Hold your offset spatula horizontally and gently pull the excess frosting inward toward the center of the cake.

Use a light touch! You're only removing the frosting sticking up around the edge, not pressing down into the top of your cake.

Remember to clean your spatula between every swipe for the neatest finish.

And just like that, your cake is frosted and ready to become a pumpkin!

Screenshot 2026-10-15 at 2.54.44%E2%80%AFPM.png

Step 4: Create Your Pumpkin's Ridges

Every pumpkin needs those classic curved lines!

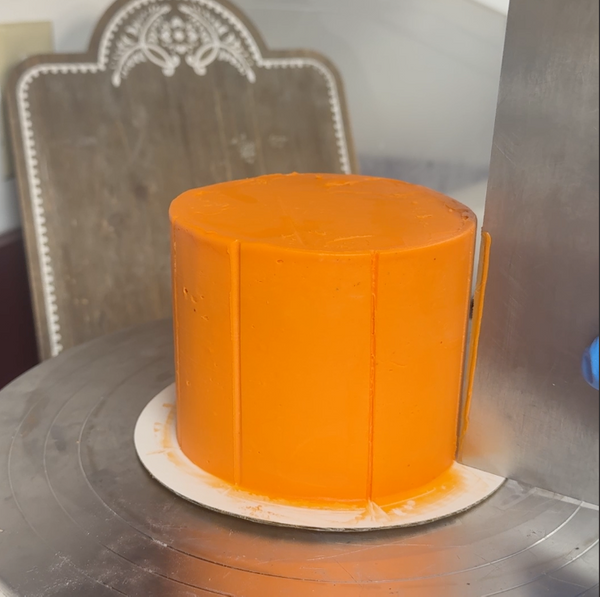
To create the pumpkin's ridges, we'll make evenly spaced indentations around the outside of the cake.

Here's an easy way to space them:

  1. Start by marking the front of your cake.

  2. Make another line directly opposite it for the back.

  3. Add lines on the left and right sides.

  4. Finally, add another line between each of those four sections.

You'll end up with approximately eight evenly spaced pumpkin ridges.

Use the edge of your flat scraper to gently press into the frosting and emphasize each line.

You can make your ridges as subtle or as pronounced as you'd like. No two pumpkins look exactly alike!

Screenshot 2026-10-15 at 2.56.27%E2%80%AFPM.png

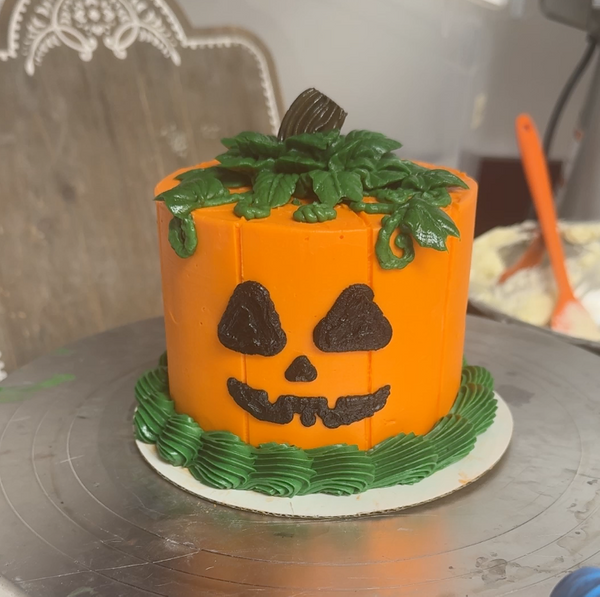
Step 5: Give Your Jack-o'-Lantern a Face

Now comes one of the most exciting parts โ€” giving your pumpkin some personality!

Using your decorating frosting, create:

  • Two triangles for the eyes.

  • One smaller triangle for the nose.

  • A jack-o'-lantern mouth with whatever expression you like!

You can make your pumpkin look happy, silly, mischievous, or spooky.

Decorating Tip: Decide which side of your cake looks best and make that the front. If you have a visible seam from smoothing your frosting, keep it toward the back.

You can decorate the face before or after adding the vines and leaves on top. Whichever order feels easiest to you!

Screenshot 2026-10-15 at 2.58.11%E2%80%AFPM.png

Step 6: Add Your Pumpkin Vines

Let's give your pumpkin a little greenery!

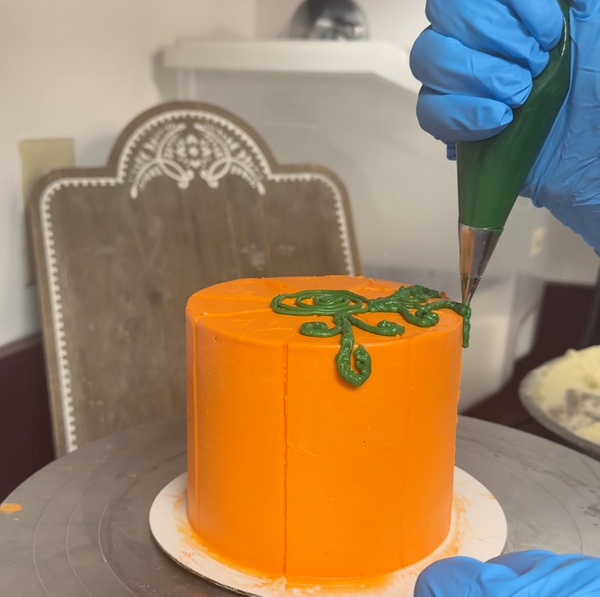
Using your green frosting, pipe curly vines across the top of the cake.

This is where you can really get creative.

Try making:

  • Little squiggles and curls.

  • Loose loops and spirals.

  • Long vines that trail over the edge.

  • Vines that stretch all the way down to your cake board.

There's no wrong way to do it!

Screenshot 2026-10-15 at 2.59.25%E2%80%AFPM.png

Step 7: Pipe Your Pumpkin Leaves

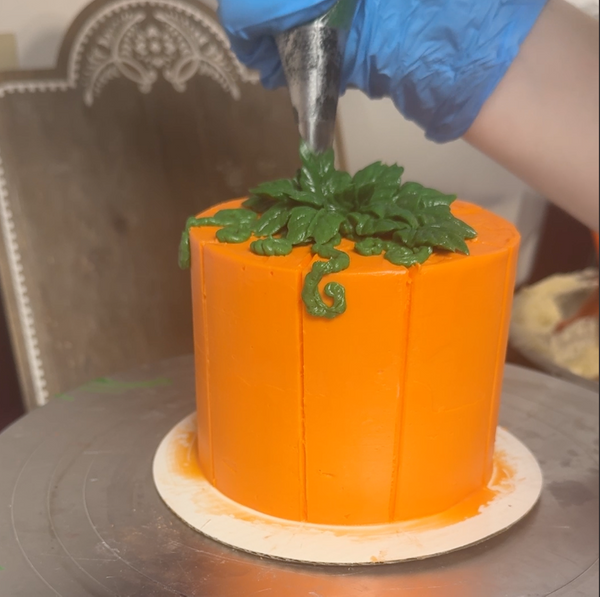
Once you're happy with your vines, it's time to add the leaves.

Pipe your leaves in a circle around the center of the top of your cake, leaving a small open space in the middle for the pumpkin stem.

You can arrange the leaves neatly or let them overlap naturally for a more playful, organic look.

Screenshot 2026-10-15 at 3.01.09%E2%80%AFPM.png

Step 8: Add the Finishing Touches

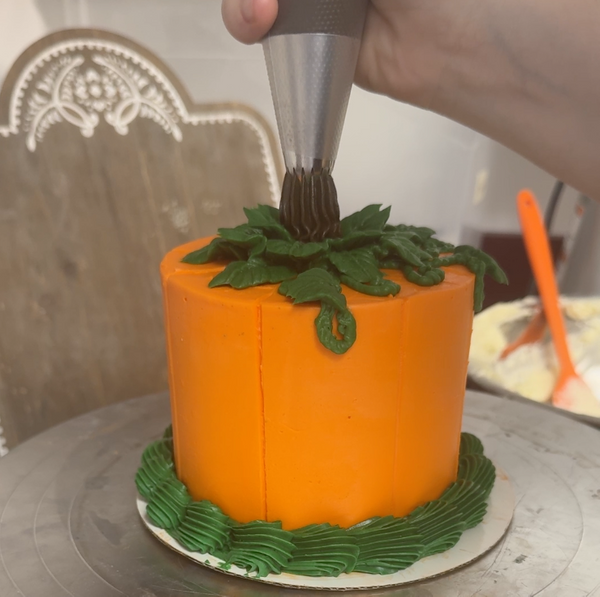
Finish your jack-o'-lantern by adding the pumpkin stem to the open space at the top center of the cake.

Take a look at your creation and add any final details you'd like.

Maybe your pumpkin needs another vine, an extra leaf, or a little touch-up around its smile.

Once you're happy with it, your Halloween masterpiece is complete! ๐ŸŽƒ

A Few Cake Decorating Tips for Beginners

Take your time. Smooth frosting takes practice, so don't get discouraged if you need a few extra passes with your scraper.

Keep your tools clean. Scraping excess frosting from your spatula and scraper between uses makes a big difference.

Chill when needed. If your frosting gets too soft or your cake starts shifting, a few minutes in the freezer can help firm things up.

Have fun with it! Your cake doesn't need to look exactly like ours. Give your pumpkin its own personality!

  • IMG_5017.jpeg
  • IMG_5022.jpeg
  • IMG_4979.jpeg
  • IMG_4986.jpeg

Show Us Your Pumpkin! ๐ŸŽƒ

We would LOVE to see how your jack-o'-lantern cakes turn out!

Once you've finished decorating, snap a picture and share it with us on Facebook or tag The Cottage Cakery on social media.

Whether your pumpkin is cute, creepy, silly, or somewhere in between, we can't wait to see what you create!

Happy decorating, and Happy Halloween from The Cottage Cakery! ๐Ÿงก

Screenshot 2026-10-15 at 3.08.27%E2%80%AFPM.png

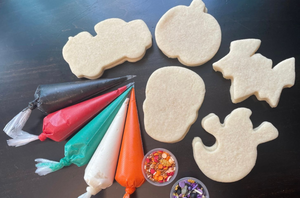
DIY Halloween Cookie Decorating Kit

12 Cookies, 5 Frosting Colors, 2oz of Sprinkles

ChatGPT Image Oct 5, 2026, 07_48_03 PM.png

Want to Decorate Your Own Halloween Cake?

Our DIY Halloween Cake Decorating Kits are available in four fun designs: Jack-o'-Lantern, Ghost, Frankenstein, and Monster!